> ## Documentation Index
> Fetch the complete documentation index at: https://blockbear.app/llms.txt
> Use this file to discover all available pages before exploring further.
# pinboard
> card based journalling system
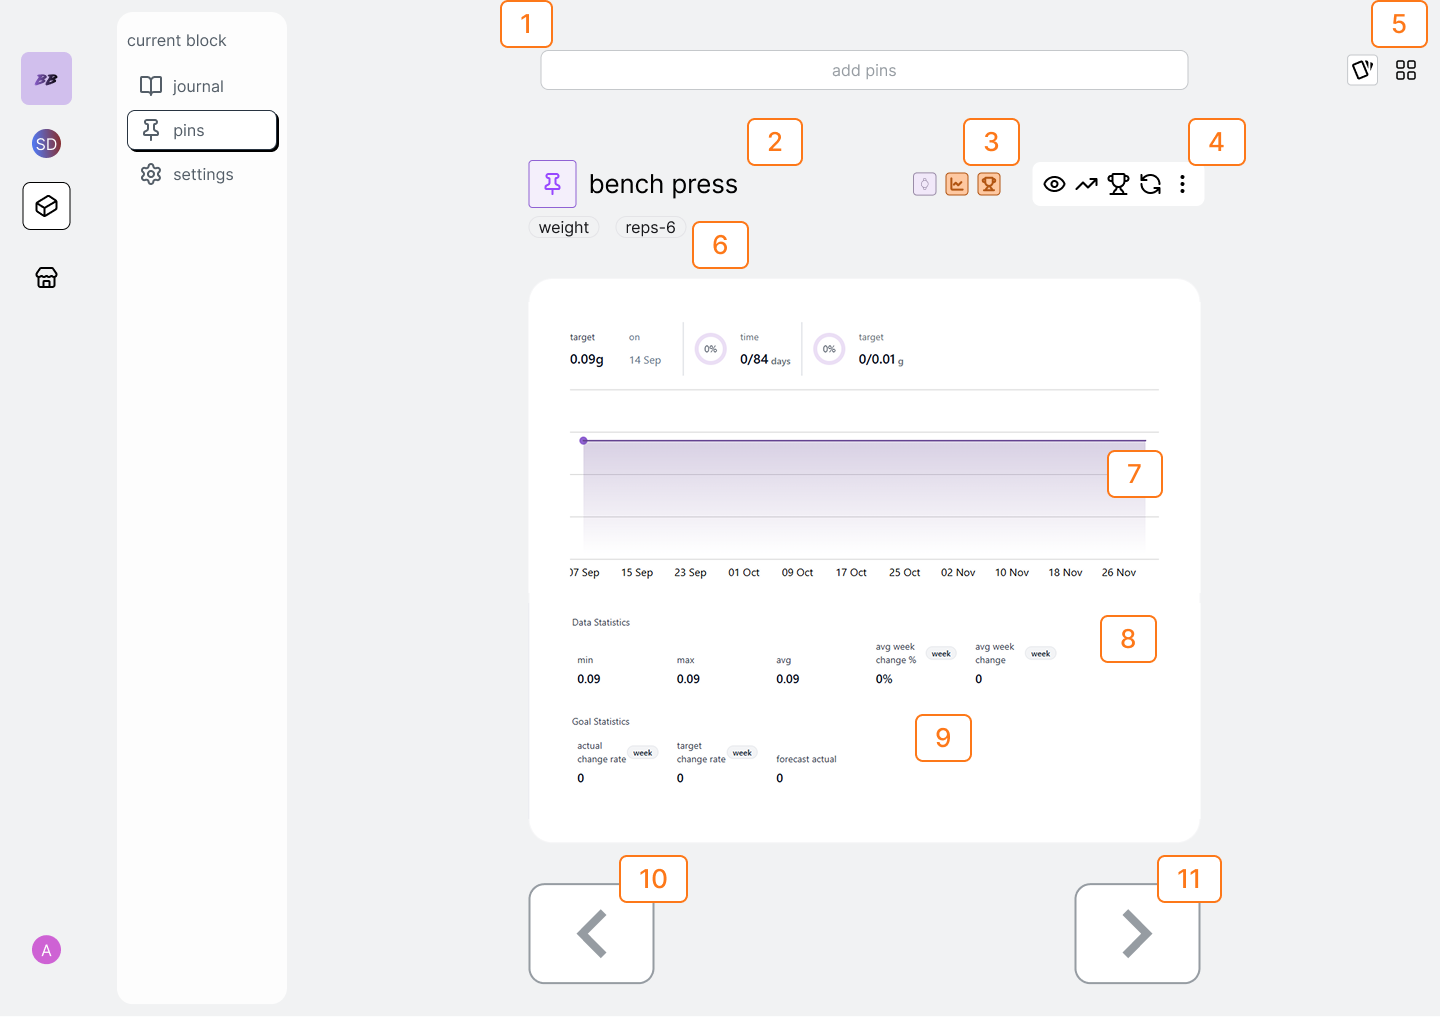 | Num | Description |
| --- | -------------------------------------- |
| 1 | Pin Searchbar |
| 2 | Pin Name |
| 3 | Pin Active Badge Group |
| 4 | Pin Options |
| 5 | Grid / Card Toggle |
| 6 | Activity Field Bages |
| 7 | Chart |
| 8 | Actual Statistics Group |
| 9 | Goal Statistics Group (if active goal) |
| 10 | Previous Pin Button |
| 11 | Next Pin Button |
## pinboard flows
### toggle grid view
to quickly view all the pins in the block click the grid toggle
| Num | Description |
| --- | -------------------------------------- |
| 1 | Pin Searchbar |
| 2 | Pin Name |
| 3 | Pin Active Badge Group |
| 4 | Pin Options |
| 5 | Grid / Card Toggle |
| 6 | Activity Field Bages |
| 7 | Chart |
| 8 | Actual Statistics Group |
| 9 | Goal Statistics Group (if active goal) |
| 10 | Previous Pin Button |
| 11 | Next Pin Button |
## pinboard flows
### toggle grid view
to quickly view all the pins in the block click the grid toggle
.png?fit=max&auto=format&n=SjTsj6GhTK-I8Mi0&q=85&s=ef759eb0bc3e1641500001e2ba2a97f8) clicking on the pin card will open the nav the carousel to the pin you selected
### add a pin
search the pin from searchbar and click on the search result.
### delete a pin
select the vertical ellipses from the option-group and select delete pin
from the dropdown menu.
### navigate to a different pin
either scroll through the pin carousel or select grid view to view all of
your pins in grid-view.
### view pin trends
select the eye icon from the options group and select the trends you want to
see.
### change field settings for an a-pin
tap the Activity Field Badges to open the select-a-pin-fields modal.
clicking on the pin card will open the nav the carousel to the pin you selected
### add a pin
search the pin from searchbar and click on the search result.
### delete a pin
select the vertical ellipses from the option-group and select delete pin
from the dropdown menu.
### navigate to a different pin
either scroll through the pin carousel or select grid view to view all of
your pins in grid-view.
### view pin trends
select the eye icon from the options group and select the trends you want to
see.
### change field settings for an a-pin
tap the Activity Field Badges to open the select-a-pin-fields modal.
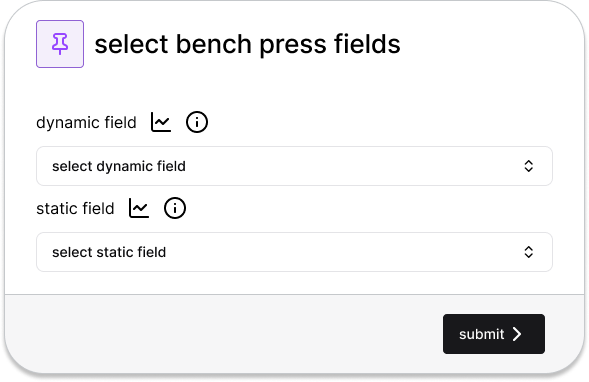 click submit to save your changes
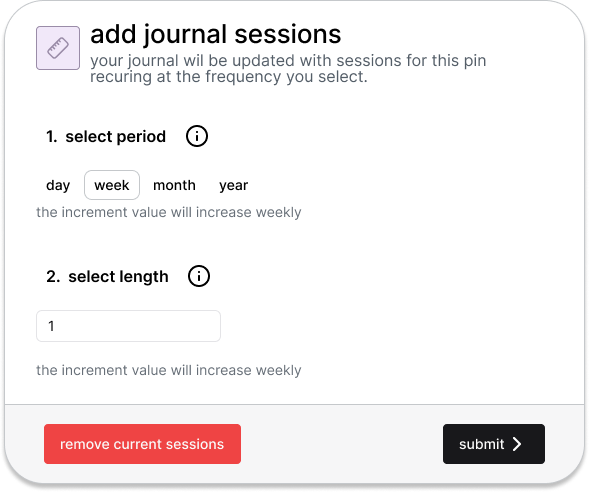
### add journal sessions for your pin
populate your block's journal with sessions for this pin based on your
defined frequency by selecting the recur icon from the options-group
click submit to save your changes
### add journal sessions for your pin
populate your block's journal with sessions for this pin based on your
defined frequency by selecting the recur icon from the options-group
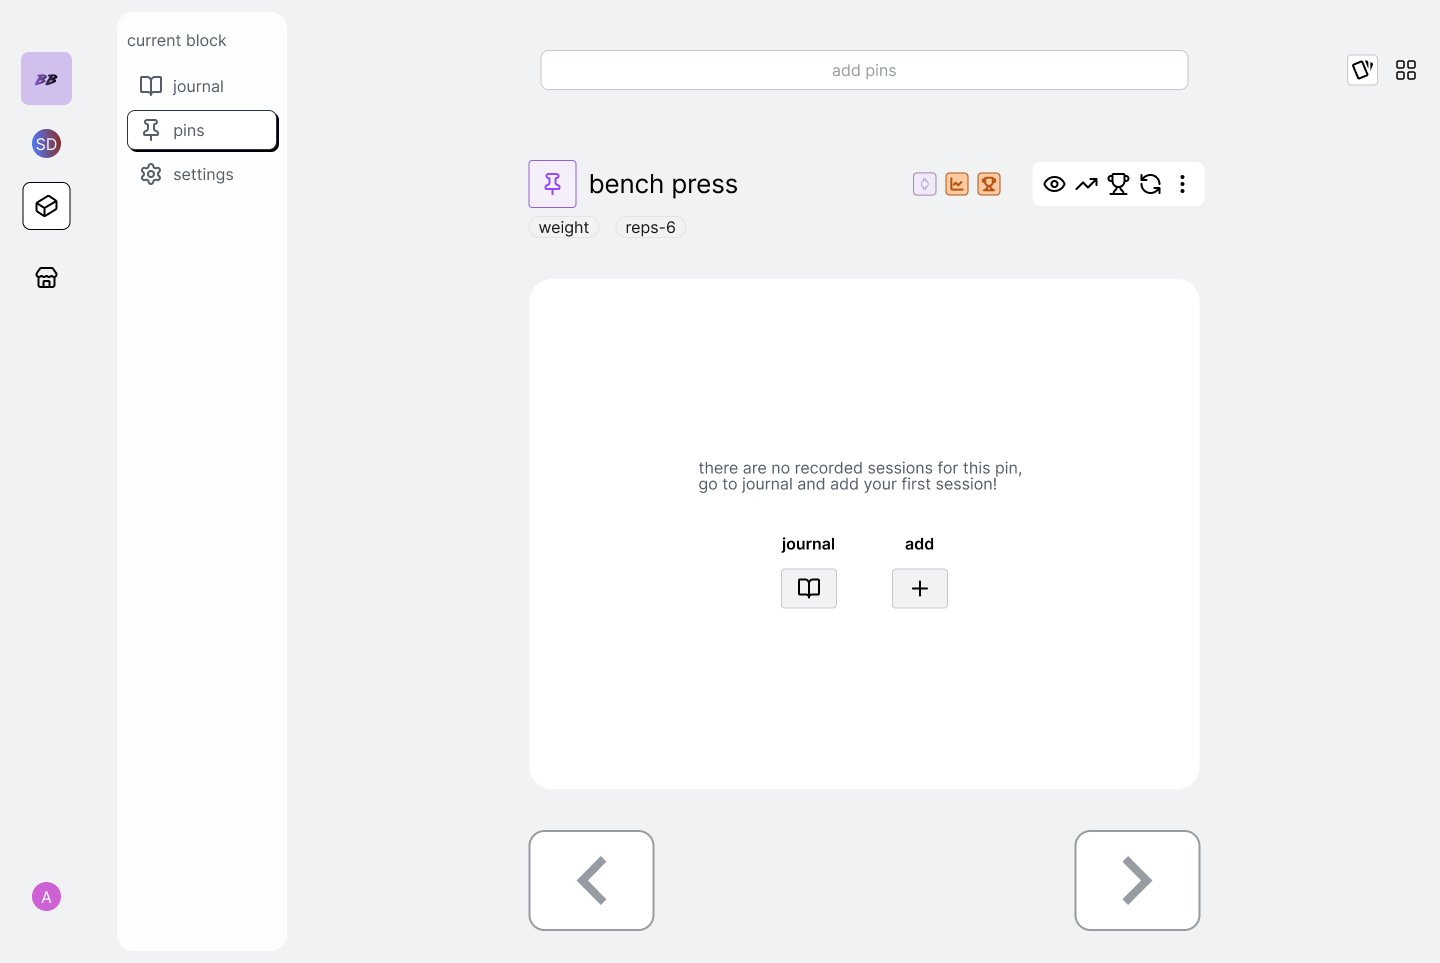
 ### quick add cards for your pin
you can quickly complete cards from your pin by selecting the plus icon in
the pin-options-group. This means for you can add completed cards without
having to go to the journal for those odd or one-off points you want to
capture.
Once you press the plus icon, the quick-add-card modal will present the
matching card for your pin with a submit button.
Once completed, your journal will also be updated to reflect the newly
completed card!
### complete your first card
if viewing a pin that you haven't completed a card for yet, you will be
prompted to complete a card first from either the journal or by doing a
quick-add.
### quick add cards for your pin
you can quickly complete cards from your pin by selecting the plus icon in
the pin-options-group. This means for you can add completed cards without
having to go to the journal for those odd or one-off points you want to
capture.
Once you press the plus icon, the quick-add-card modal will present the
matching card for your pin with a submit button.
Once completed, your journal will also be updated to reflect the newly
completed card!
### complete your first card
if viewing a pin that you haven't completed a card for yet, you will be
prompted to complete a card first from either the journal or by doing a
quick-add.
 ## goal flows
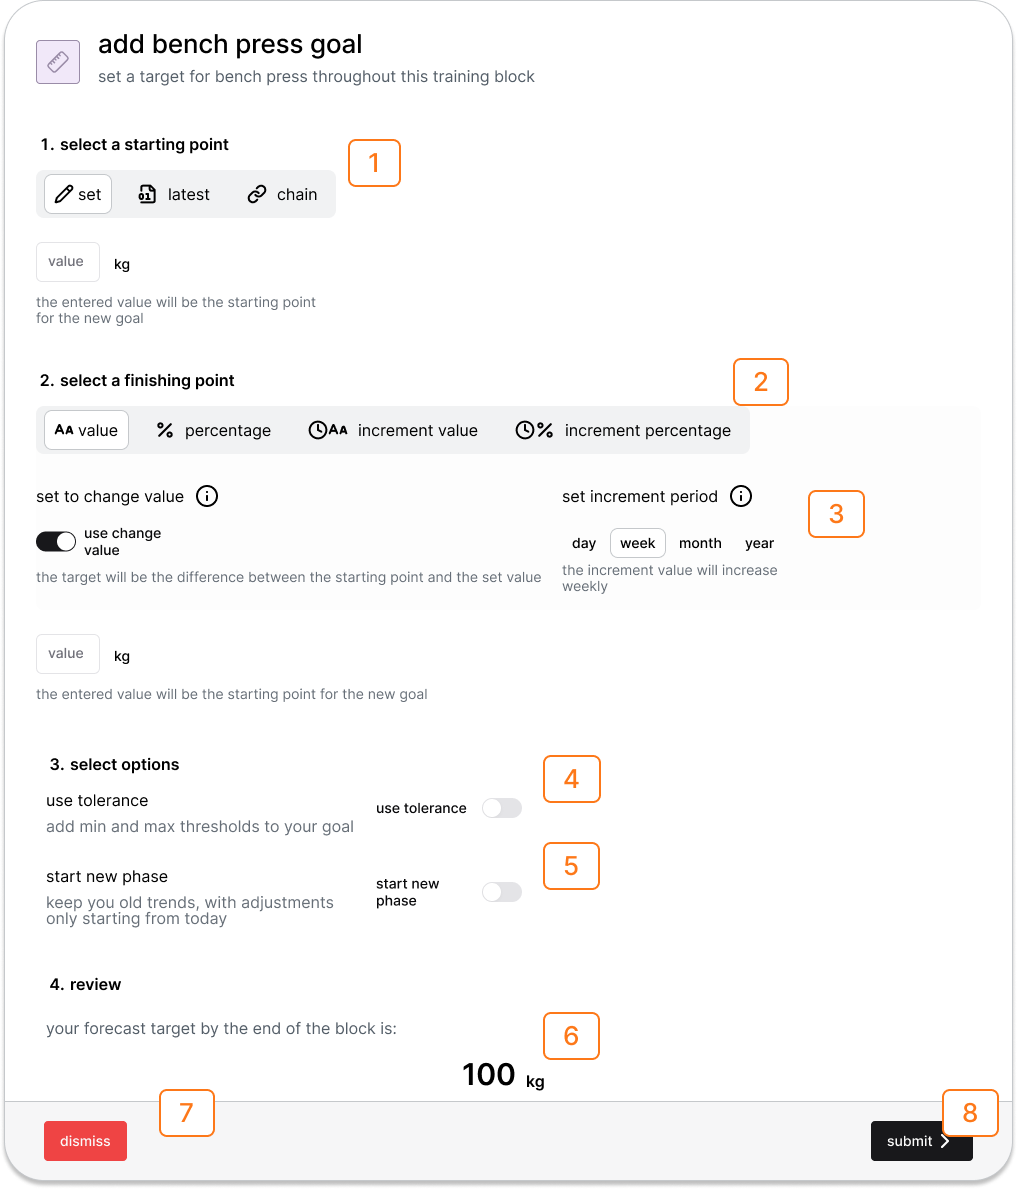 | Num | Description |
| --- | ---------------------------- |
| 1 | Starting Point Option Group |
| 2 | Finishing Point Option Group |
| 3 | Option Group Sub-Options |
| 4 | Use tolererance |
| 5 | Start new goal phase |
| 6 | Forecasted Finish Value |
| 7 | Delete Goal Button |
| 8 | Submit Goal Button |
### add or edit pin goal
select the goal icon from the options group to open either the
m-pin-goal-builder or the a-pin-goal-builder modals.
### set a goal with a desired starting point
from the goal-builder, select set from the starting point options. The
starting point of the goal will be the value set in input field.
### set a goal from you last recorded point
from the goal-builder, select "latest" from the starting point options. The
starting point of the goal will be the value of your last session. This
option will be disabled if you don't have any recorded results.
### set a goal from a different block's projected or historical finish point
from the goal-builder, select "chain" from the starting point options. The
starting point of the goal will be the value of a goal in the selected block
that matches the pin type of your current pin. This tool enables you to
chain goals together through blocks to create multi-block projections. If no
goal in the selected block matches you current pin, or the block itself does
not have a start and finish because it is not scheduled, then this option
will be greyed out.
### set a goal with a desired target
from the goal-builder, select set from the starting point options. The
starting point of the goal will be the value set in input field.
### set a goal from you last recorded point
from the goal-builder, select "latest" from the starting point options. The
starting point of the goal will be the value of your last session. This
option will be disabled if you don't have any recorded results.
### set a goal from a different block's projected or historical finish point
from the goal-builder, select "chain" from the starting point options. The
starting point of the goal will be the value of a goal in the selected block
that matches the pin type of your current pin. This tool enables you to
chain goals together through blocks to create multi-block projections. If no
goal in the selected block matches you current pin, or the block itself does
not have a start and finish because it is not scheduled, then this option
will be greyed out.
### set a goal with a desired target
from the goal-builder, select your starting value and select "value". This
will set the forecast target to the value you set in the input field.
### set a goal with a change target
from the goal-builder, select the desired goal type either: value, value
percentage, incremental value or incremental percentage.
Select the "use change value" from the sub-sections. This will make the
forecast target equal to the difference between the starting point and the
value you set in the input field.
### set a goal with a percentage target
from the goal-builder, select the percentage options either "percentage" or
"incremental percentage".
The select increment period field will be viewable in the sub-section
options allowing you to select desired increment period throughout the block
with either: day, week, fortnight, monthly options. The forecast target will
now use the percentage value entered in the input field. Selecting "use
change value" use use the percentage value when calculating the difference;
for example -0.5% bodyweight per week is a incremental percentage goal which
uses a change value.
### set a goal with an incremental target
from the goal-builder, select the incremental options either "incremental
value" or "incremental percentage".
The select increment period field will be viewable in the sub-section
options allowing you to select desired increment period throughout the block
with either: day, week, fortnight, monthly options.
### add new goal phase
from the goal-builder, select the "start new phase" toggle
Choose for the new phase initial value to start from either your current
goal trendline, or your actual linear trendline.
| Num | Description |
| --- | ---------------------------- |
| 1 | Starting Point Option Group |
| 2 | Finishing Point Option Group |
| 3 | Option Group Sub-Options |
| 4 | Use tolererance |
| 5 | Start new goal phase |
| 6 | Forecasted Finish Value |
| 7 | Delete Goal Button |
| 8 | Submit Goal Button |
### add or edit pin goal
select the goal icon from the options group to open either the
m-pin-goal-builder or the a-pin-goal-builder modals.
### set a goal with a desired starting point
from the goal-builder, select set from the starting point options. The
starting point of the goal will be the value set in input field.
### set a goal from you last recorded point
from the goal-builder, select "latest" from the starting point options. The
starting point of the goal will be the value of your last session. This
option will be disabled if you don't have any recorded results.
### set a goal from a different block's projected or historical finish point
from the goal-builder, select "chain" from the starting point options. The
starting point of the goal will be the value of a goal in the selected block
that matches the pin type of your current pin. This tool enables you to
chain goals together through blocks to create multi-block projections. If no
goal in the selected block matches you current pin, or the block itself does
not have a start and finish because it is not scheduled, then this option
will be greyed out.
### set a goal with a desired target
from the goal-builder, select set from the starting point options. The
starting point of the goal will be the value set in input field.
### set a goal from you last recorded point
from the goal-builder, select "latest" from the starting point options. The
starting point of the goal will be the value of your last session. This
option will be disabled if you don't have any recorded results.
### set a goal from a different block's projected or historical finish point
from the goal-builder, select "chain" from the starting point options. The
starting point of the goal will be the value of a goal in the selected block
that matches the pin type of your current pin. This tool enables you to
chain goals together through blocks to create multi-block projections. If no
goal in the selected block matches you current pin, or the block itself does
not have a start and finish because it is not scheduled, then this option
will be greyed out.
### set a goal with a desired target
from the goal-builder, select your starting value and select "value". This
will set the forecast target to the value you set in the input field.
### set a goal with a change target
from the goal-builder, select the desired goal type either: value, value
percentage, incremental value or incremental percentage.
Select the "use change value" from the sub-sections. This will make the
forecast target equal to the difference between the starting point and the
value you set in the input field.
### set a goal with a percentage target
from the goal-builder, select the percentage options either "percentage" or
"incremental percentage".
The select increment period field will be viewable in the sub-section
options allowing you to select desired increment period throughout the block
with either: day, week, fortnight, monthly options. The forecast target will
now use the percentage value entered in the input field. Selecting "use
change value" use use the percentage value when calculating the difference;
for example -0.5% bodyweight per week is a incremental percentage goal which
uses a change value.
### set a goal with an incremental target
from the goal-builder, select the incremental options either "incremental
value" or "incremental percentage".
The select increment period field will be viewable in the sub-section
options allowing you to select desired increment period throughout the block
with either: day, week, fortnight, monthly options.
### add new goal phase
from the goal-builder, select the "start new phase" toggle
Choose for the new phase initial value to start from either your current
goal trendline, or your actual linear trendline.